Installing a septic system can initially seem overwhelming, particularly to homeowners new to plumbing and construction. However, with a good understanding of the steps involved and proper guidance, a successful do-it-yourself (DIY) installation is achievable. This comprehensive guide serves as a valuable resource to aid homeowners throughout this challenging yet rewarding process.
Key Considerations: Assessing Your Property Suitability
Before beginning the installation of a septic system, a thorough evaluation of your property is necessary. This ensures both compliance with local regulations and the environmental safety of your system.
Conducting a Soil Evaluation
Soil is one of the foundation elements in determining the appropriate type of septic system to install. A percolation test, commonly known as a “perc test,” measures how well and quickly water drains through soil. This test helps determine:
- Drainage Capacity: Identify whether the soil can adequately absorb and filter wastewater.
- System Design: Inform the type and size of the septic system that would be most effective.
- Environmental Impact: Reduce the risk of groundwater contamination or system failure due to improper placement.
Engaging a professional to conduct this assessment is advisable, as they can accurately interpret the results and offer recommendations on the type of system that best suits your property.
Obtaining the Necessary Permits for Installation
Once the property assessment is complete, the next step is to secure the necessary permits to ensure compliance with local regulations.
Understanding Local Regulations and Requirements
Requirements vary widely based on location, but generally include submitting a detailed plan to the local health department or environmental agency. This plan should cover:
- System Design: Include the proposed layout and size of the septic tank and drainfield based on your soil evaluation results.
- Water Usage Estimates: Provide data regarding the expected daily water flow from your household to help determine system sizing.
- Environmental Impact Assessments: In some cases, you may need to include details on how your system will mitigate potential contamination risks.
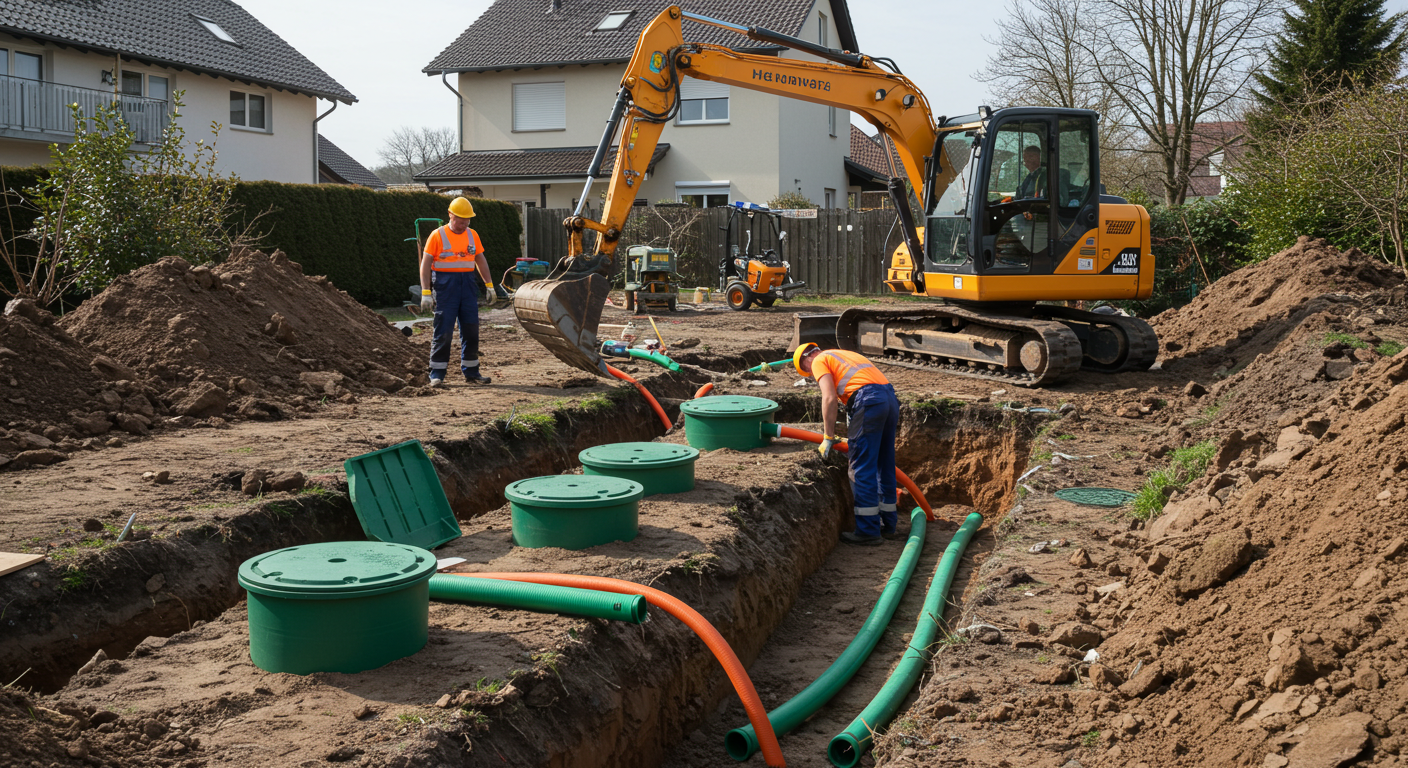
Excavation: Preparing the Site for Installation
The excavation process is crucial for ensuring a proper fit for the septic system components and their longevity. Preparing the site involves more than just digging; it requires careful planning and execution to maintain the integrity of the surroundings.
Techniques for Safe and Effective Excavation
As you prepare for excavation, keep in mind the following techniques:
- Clearly outline where the tank and drainfield will be positioned. Using flags and spray paint can help create visible boundaries.
- Depending on the size of the project, you may require a backhoe or excavator to dig properly. Manual tools may suffice for smaller areas.
- Ensure the excavation site is marked for safety, with warning signs and barriers to prevent accidents.
Installing the Septic Tank and Drainfield
The installation of both the septic tank and the drainfield is key to the overall success of the system. This phase must be approached systematically to ensure proper function.
Steps to Successfully Install a Septic Tank and Drainfield
During the installation process, focus on the following steps:
- Ensure it is level and appropriately aligned with the inlet and outlet pipes. This involves lowering it into the excavated hole with care.
- Lay out perforated pipes in trenches, ensuring they are sloped correctly for optimal drainage.
- Fill around the septic tank and pipes with gravel or soil, carefully compacting to avoid future settling.
Connecting Plumbing and Ensuring Proper Operation
Connecting the household plumbing system correctly to the septic system is crucial for functionality. This involves linking pipes from your home directly to the septic tank, as well as ensuring that all joints and connections are sealed and watertight.
Best Practices for Plumbing Connections
Follow these best practices when connecting your plumbing:
- Pipes should slope at least 1/4 inch per foot towards the septic tank to ensure adequate flow.
- Employing high-quality PVC pipes and fittings will enhance durability and reduce the risk of leaks.
- Use PVC cement for joints, checking after installation for any signs of leaks.
Testing Your System: Ensuring Everything Works
Once installation is complete, it is imperative to conduct thorough testing on the septic system. This final phase ensures everything functions as intended before use.
Testing Procedures for Your Septic System
Key testing procedures include:
- Look for leaks or improper connections. Observing the system during operation can reveal potential problems.
- Introduce water into the system to monitor the flow rates and watch for any slowdowns or backups.
- Ensure that airing systems are working efficiently, preventing gas buildup.
Installing a septic system is a significant but manageable step in maintaining a healthy, self-sufficient property. With careful planning, professional guidance, and a solid understanding of the process, homeowners can ensure long-term performance and environmental safety.