Bringing natural light into a home through skylights is not only a stylish addition but also a practical one. Skylight installation can elevate an ordinary room to extraordinary by enhancing its ambiance and providing warmth and brightness. Below, we explore the fundamental aspects of skylight installation, ensuring that integrates seamlessly into your home.
The Different Types of Skylights
Before embarking on your skylight installation journey, it’s vital to familiarize yourself with the different types available. Here’s a breakdown of common skylight types:
- Fixed Skylights: These non-operable units are primarily designed to bring light into a space without allowing for ventilation. They are a great choice for areas that benefit from abundant sunlight and where ventilation is not a primary concern.
- Ventilating Skylights: With the ability to open, these skylights promote airflow within a room. They are excellent for kitchens and bathrooms where moisture build-up can occur.
- Tubular Skylights: Ideal for smaller spaces, these innovative options use reflective tubes to channel natural light into areas that are too compact for traditional skylights.
- Custom Skylights: For those with unique architectural designs, custom skylights can be tailored to fit specific dimensions and aesthetics.
Step-by-Step Guide to Skylight Installation
Once you’ve selected the appropriate skylight, you must understand the installation process. Below are the key steps:
Preparation and Planning
Before any physical work begins, thorough planning is key. Consider the following:
- Identify the area where the skylight will be installed. Factors such as sunlight direction and potential obstructions must be taken into account.
- Essential tools include a power drill, circular saw, roofing nails, a ladder, and a utility knife. Ensure safety gear such as harnesses are on hand.
- Ideal weather conditions are vital. Schedule your installation during dry days to prevent any mishaps caused by rain or wind.
Cutting the Roof Opening
The first physical step is to cut the opening in the roof. Here’s how to ensure it’s done correctly:
- Mark the dimensions of the skylight on the roof, ensuring it aligns with the rafters.
- Using a circular saw, carefully cut through the roofing material and framing.
- Remove shingles around the newly cut area to ensure a clean workspace.
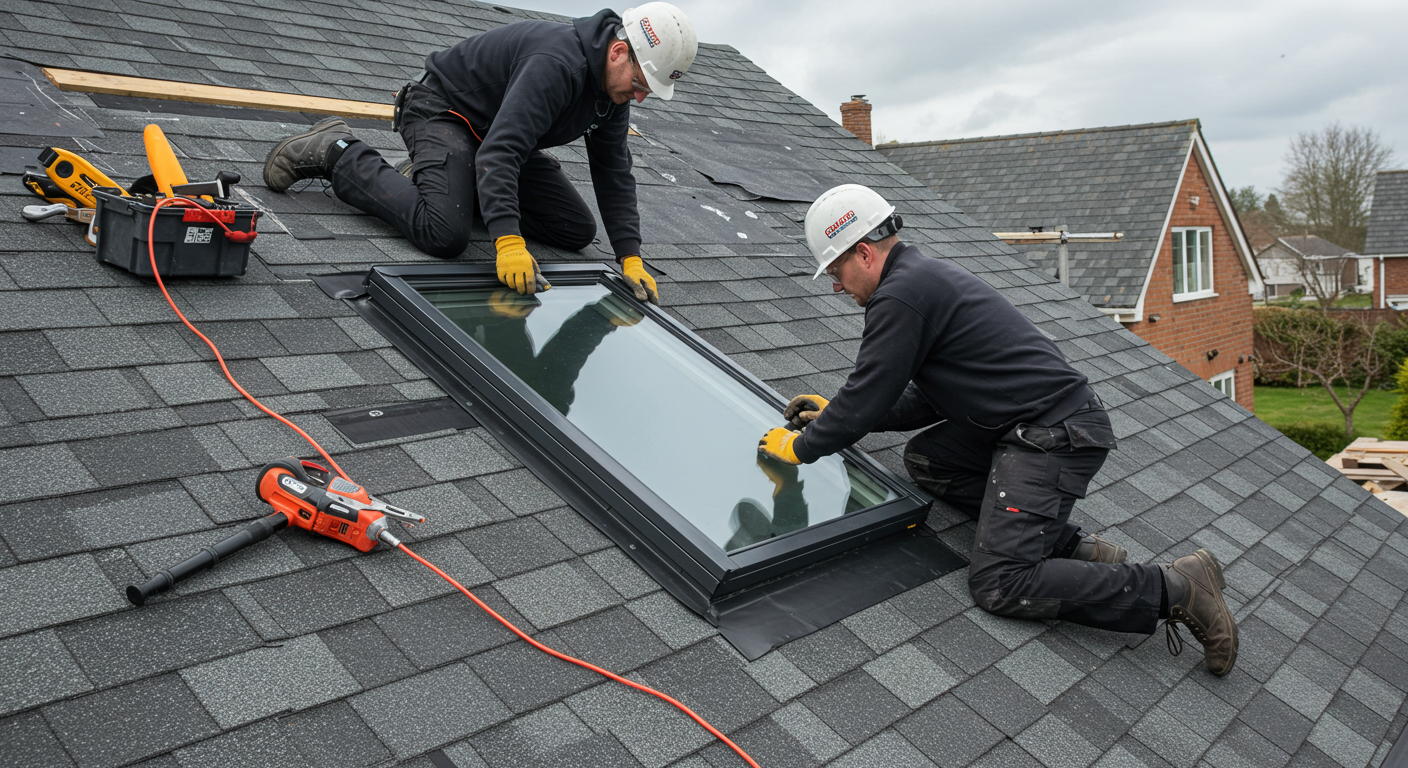
Installing the Skylight
With the opening prepared, it’s time to install the skylight:
- Apply flashing around the skylight’s perimeter for waterproofing.
- Carefully place the skylight into the opening, ensuring it’s level and securely attach it using roofing nails.
- Use a waterproof membrane to affix around the edges for added protection.
Once each installation stage is completed, inspect the skylight from both the inside and outside of the house to ensure it is secure.
Essential Tips for Successful Skylight Installation
While the steps mentioned provide a robust framework for installation, certain tips can significantly enhance the overall experience and outcome:
- While DIY enthusiasts can tackle skylight installation, hiring experts can mitigate risks associated with roofing tasks.
- Choosing high-quality skylights ensures durability and long-term satisfaction.
- Once installed, conduct periodic checks on the roofing flashings and membranes, ensuring they are intact and functioning effectively.
Wrapping Up the Skylight Installation Process
Incorporating skylights into your home is a transformative journey that merges functionality with design. By understanding the types available, following a structured installation process, and applying expert tips, homeowners can achieve remarkable results. Ultimately, whether you opt for a sleek skylight or a classic, these features will undoubtedly enrich your living experience immeasurably.